
Airbnb Photo Editing Tips: 7 Must-Know Secrets for Stunning, Irresistible Listings
Are you ready to transform your Airbnb photos from “meh” to “magnificent”?
Let’s face it: with countless properties vying for attention, high-quality images are your secret weapon in the hosting game. Your listing deserves more than just a haphazard snap taken during an Airbnb photoshoot (we’ve all been there!).
Think about it—those perfect shots can boost your booking rate and give potential guests all the feels before they even step foot in your space. It’s not just about meeting the Airbnb photo requirements; it’s about captivating hearts and minds with every pixel!
In this friendly guide, we’re diving deep into seven Airbnb photo editing tips that will elevate your images like a home-cooked meal on a misty Sunday morning.
From mastering color correction to sharpening those finer details, our tips are here to help you capture the true essence of your rental.
We’ll arm you with practical techniques that don’t require a degree in photography or hours lost in an editing labyrinth—just straightforward hacks that make editing feel less daunting and more empowering!
Ready to sprinkle some magic on your listings? Buckle up, because we’re soon turning snapshots into showstoppers!
Understanding Color Correction
If you’ve ever glanced at a beautiful sunset photo from an airbnb photoshoot and thought, “Wow, that’s not what I saw with my own two eyes,” then you understand the magic that color correction can bring to your images.
Think of it as giving your airbnb photo a little fitness makeover—polishing up those hues to make everything pop!
By tweaking colors, you can transform bland images into stunning visual stories that draw potential guests in like moths to a flame. After all, who wouldn’t want to stay in a vibrant, welcoming space rather than one that looks like it was snapped on a rainy Monday morning?
Now let’s talk tools because wielding the right software will make all the difference. From user-friendly apps like Adobe Lightroom and Canva (yes, even your mom’s favorite graphic design tool) to heavy hitters like Photoshop for those feeling especially adventurous.
Each platform packs features designed specifically for color correction—from adjusting saturation and vibrancy to playing with shadows and highlights. Remember though: different platforms have different learning curves! A quick YouTube tutorial might just become your new best friend if you’re unsure where to start.
However, while it’s tempting to go wild with filters and color sliders, maintaining authenticity should be at the top of your priority list—it’s not cute when your rental looks more cartoonish than cozy!
A motivated user could even look into some historical data on Airbnb photo requirements—they’re quite clear about wanting true-to-life depictions! With thoughtful adjustments, you’ll ensure that guests don’t arrive only for a surprise meet-and-greet with reality…and their disappointment.
So gear up for some editing fun: once you nail down color correction, you’ll be well on your way to creating inviting visuals that showcase your listing’s unique charm!
Mastering Exposure Adjustments
When it comes to photography, exposure is the superhero that swoops in to save your images from looking drab or washed out.
Think of it as the mood ring of your photos—it can transform a dull spaceship of a rental into a cozy, well-lit homestead that beckons guests like a moth to a flame (or should we say more like renters to an Instagram-worthy oasis?).
If your photo feels too dark or too bright, you’re not just losing some visual punch; you’re potentially missing out on bookings. So let’s unleash the power of proper exposure!
If you’ve ever looked at an image and thought, “Wow, this looks like it’s been through some heavy partying!” you’ve probably seen underexposed shots. These low-light culprits lack detail and can make even the cutest little cabin look like it’s straight out of a horror movie.
Fear not! Brightening these suckers up doesn’t involve summoning any magical powers—just a few simple techniques! Use tools like Adobe Lightroom or Photoshop’s Camera Raw filter to adjust shadows and highlights.
Adding some extra brightness will rescue those sad tones and bring life back into your space. On the flip side, overexposed images? They’re those cheerful moments captured after everyone’s had one too many cocktails—and we’re just not going there yet! Tame those bright spots and balance things out with adjustments in contrast and exposure.
For nailing down your exposure levels effectively without losing yourself in tech jargon, consider using user-friendly tools like Snapseed app or Canva for mobile editing while lounging on the couch. Trust us; they do wonders without requiring a PhD in Computer Science!
Using sliders to make quick adjustments is as satisfying as finding money in yesterday’s jeans—everything suddenly becomes brighter (literally). Whether it’s darkening landscapes or softening overly-bright interiors, embrace trial-and-error: fiddle with settings until you’ve captured that perfect glow.
So next time you pull up an image ready for its big debut online, remember that mastering exposure isn’t just about making things visible; it’s about creating an atmosphere that makes potential guests feel at home before they’ve even unpacked! With some practice you’ll transform even the light-challenged corners of your Airbnb into dreamy destinations worth booking—not creepy film sets begging for exit signs.
Softening Techniques to Create a Warm Atmosphere
If you want your Airbnb photos to radiate with that cozy, can’t-wait-to-book vibe, softening techniques are your best friend!
Think about it: when you walk into a beautifully curated space, the last thing you want is harsh edges or too much detail screaming for attention. Softened edges create this beautiful, dreamy atmosphere that just invites guests in. Imagine flipping through an Airbnb listing where the pictures whisper, “Welcome home!” instead of shouting “Look at all my crazy corners!” See what we did there?
Now let’s dive into a step-by-step guide for perfecting those editing soft touches. Grab your favorite photo editing tool (Photoshop, Lightroom, or even good ol’ Snapseed) and get ready to take a deep breath because here’s how it goes:
- First up, open your desired image—ideally one you took during an awe-inspiring Airbnb photoshoot.
- Next, look for the Gaussian Blur effect; this little savior helps smooth out any distractions while still keeping enough clarity on key features like comfy couches or delightful decorations. When applying this effect, keep it subtle (a little goes a long way!) and adjust the opacity until you’re seeing butterflies but not blurring off the map!
So when exactly should you whip out these airbnb photo-softening techniques? You might want to give those bathroom shots or cozy nooks a whirl with some gentle edge softening. They might look crucial under bright lights but remember—softening creates intimacy! It reveals calm vibes instead of high energy chaos every time someone scrolls through potential stays online.
Simply put: if you’re trying to communicate relaxation and allure in your listing—the softer, the better! Now go ahead and make those guests swoon over their future escape through eye-catching visuals!
Cropping and Framing for Better Composition
When it comes to capturing the essence of your Airbnb space, composition is everything! Think of it as the difference between a fine gourmet meal and a sad microwave dinner. A well-composed photo can showcase your listing’s charm, while poor composition might have potential guests scrolling faster than you can say “instant booking.” So why not give your photos the love they deserve with some expert cropping and framing techniques?
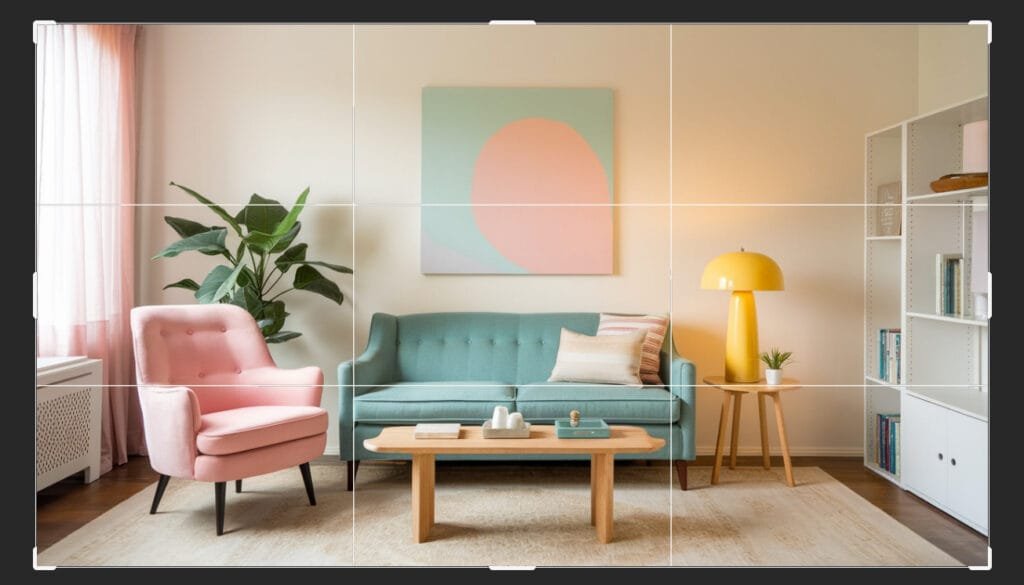
Imagine dividing your image into a tic-tac-toe board (no cheating allowed!). Position key elements along these lines or at their intersections, drawing the viewer’s eyes where you want them to go — like that adorable vintage lamp in your cozy living room or the breathtaking view from your balcony. And don’t forget about eliminating distracting elements; if Uncle Bob has photobombed in every shot, it might be time for him to take a break behind the camera.
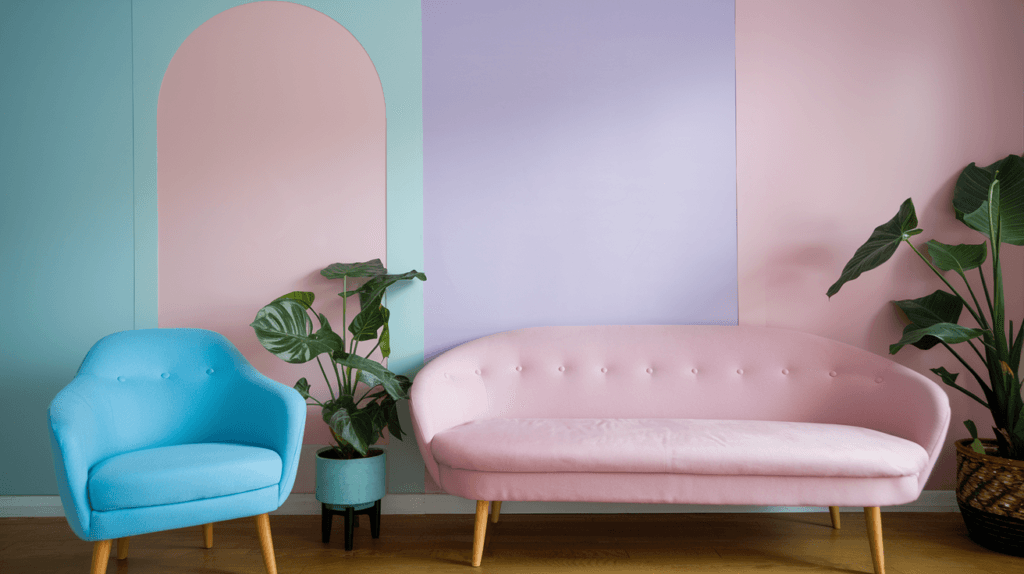
Now onto framing—consider things like leading lines and depth when snapping those glorious pics. Find natural frames in architecture or landscapes that enhance your shot, like that lovely archway on your patio or even some well-placed plants that’ll make guests feel just *that* much more connected to nature (and let’s face it, everybody loves greenery).
Tools like Adobe Lightroom and Canva are great for digital assistance. Both have nifty features that allow you to manipulate frames easily so you can experiment until you find just what fits!
In conclusion, proper cropping and smart framing will not only highlight all that wonderfulness about your Airbnb but also help create an inviting visual journey for potential guests to dive into! It’s all about making that first impression count because let’s face it: The ‘wow’ factor begins long before guests step through that door!
Utilizing Filters Wisely
Filters can be the sprinkle of fairy dust that turns your run-of-the-mill Airbnb photos into show-stopping masterpieces, but they’re not without their ups and downs. Sure, filters add a fun twist to your pics, giving them that extra “oomph” that screams, “Book me now!” However, overdoing it can turn your stunning living room into a neon funhouse—yikes! It’s all about finding the right balance. You want to enhance genuine colors and vibes, not create an Instagram filter fiasco reminiscent of an 80s music video.
So how do you choose wisely when it comes to filtering? Approach each image with intention.
Look at what the photo already conveys—does it need warmth? A little more vibrancy? Or maybe just a subtle boost in contrast? Tools like Lightroom or VSCO offer superb customization options so you can dial up the charm without overpowering the original feel of your spaces. When selecting a filter for your Airbnb photoshoot, aim for styles that replicate natural light while highlighting key selling points—like those breathtaking city views or cozy reading nooks. Remember: if the filter doesn’t enhance your airbnb photo’s story, it might be time to swipe left!
And speaking of filters that work wonders—here are some go-tos for elevating your listings! The “Clean” preset brings out those fresh whites and keeps textures alive; perfect for modern digs. For rustic retreats, try a “Warm Vintage” effect—a surefire way to evoke nostalgia (hello winter cabin vibes). If you’re showcasing bright beach properties, consider softening hues with a “Calm Ocean” filter to give potential guests dreamy vacation feels before they even step foot outside.
Ultimately, using filters is all about enhancing storytelling while adhering to those elusive Airbnb photo requirements! So trust your instincts and test different looks until you find one that reflects your unique space without drowning it in digital decadence. Now go forth and start experimenting—you’ve got this!
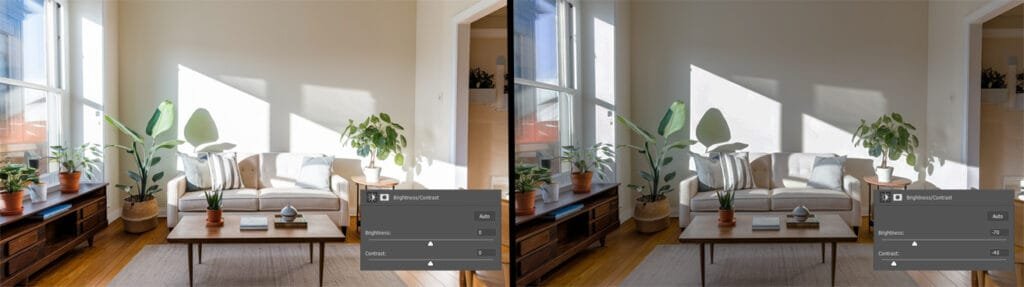
Brightness and Contrast Adjustments
Alright, let’s get lit—brightness, that is! It surprises many to learn that brightness and contrast aren’t just fancy terms your artsy friend tosses around while critiquing a lifestyle blog. While these two terms are related, they play pretty distinct roles in image editing. Brightness refers to the overall light level of your photo, making it lighter or darker on a grand scale (think of how you might make a dark room feel like paradise during a gloomy day!). Contrast, however, plays hardball by juggling the difference between the darkest darks and the lights of lights. A killer contrast adds depth and makes colors pop, giving your images that ‘wow’ factor.
Now that we’ve laid down some terminology basics, let’s chat about how to balance these two powerful features effectively. Start with adjusting brightness; strive for an inviting warmth but avoid floating into overexposure territory—nobody wants their guests feeling like they’re staring into the abyss of sunlight (or does anyone?). Once you’ve adjusted brightness to set the mood just right, it’s time to tackle contrast. Too much can cause some harsh shadows that scream “I tried way too hard,” while too little might lead your photos looking flatter than week-old soda. Aim for clarity without sacrificing softness; achieving this balance can be as glorious as finding that last slice of pizza in the fridge!
Canva’s also stepping up its photo-editing prowess if you’re looking for something simpler—it’s practically user-friendly even for those who still can’t figure out where they saved last week’s taco recipe! Don’t forget mobile apps like Snapseed or VSCO on your phone; being able to edit on-the-go means you’re always ready when inspiration strikes—just don’t do it while driving unless you want that soy latte all over your dashboard!
So go ahead, roll up those sleeves and experiment! Remember, finding that perfect blend takes practice (and possibly multiple cups of coffee). Playing around with brightness and contrast will not only create enticing visuals that’ll have guests drooling over your listings but also help develop your own unique style as an Airbnb host! Trust us—they’ll notice the effort—and hey, satisfaction guaranteed never looked so good!
Final Touches: Sharpening for Details
So, you’ve done the color correction, nailed down that perfect exposure, and even added a dreamy softening effect. But wait! Before you hit “upload,” let’s talk about one last crucial detail: sharpening. Think of sharpening as the cherry on top of your editing sundae—it emphasizes those crisp lines and intricate details in your Airbnb photos and can make all the difference between a blurry mess and an eye-catching masterpiece. After all, your guests want to see what they’re really getting into on that vacation!
When it comes to applying sharpening effects, less is often more—no one wants their gorgeous butterfly curtains looking like a Picasso painting. Start by focusing on key areas where you want to draw attention (like those custom-made throw pillows or stunning city views) instead of indiscriminately sharpening every corner of the image. Tools like Adobe Lightroom offer sliders that enable you to fine-tune how much sharpness goes into each area. If you’re feeling fancy, explore selective sharpening in Photoshop; just make sure you don’t give your kitchen tiles too much love lest they start resembling jagged mountains!
However, beware of the dreaded over-sharpening trap! It’s like when you sprinkle salt on your food but forget about it until it feels like a sodium bomb exploded in your mouth. A moderate approach goes a long way—if those edges start looking unnatural or if halo effects appear around objects, it’s time to dial it back a notch. Keep checking back with your original photo as reference so you can navigate this minefield with finesse like an artist.
In the end, understanding how to sharpen properly will help elevate your Airbnb photo game from mundane to magazine-worthy! When potential guests browse through countless listings battling for their attention, sharp images will prompt them to pause and say yes—or “YESSSS!”—to booking that stay at your place. Remember: professional-grade photography isn’t just for influencers; with these tips up your sleeve, you too can turn pro right from your living room!
Before-and-Afters: Learning from Real-Life Examples
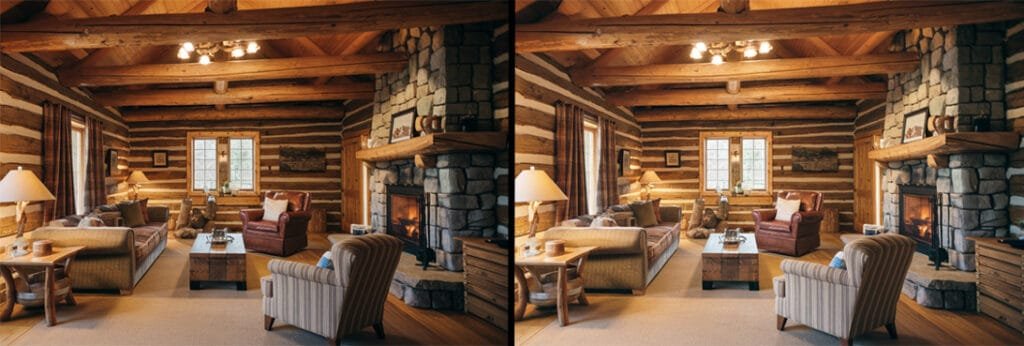
Alright, let’s get into the juicy stuff—everyone loves a good glow-up story! In the world of Airbnb photography, a before-and-after transformation can be the difference between an unbooked weekend and a fully booked season. Take, for instance, the case of “The Cozy Cabin” in the woods. The original photo showcased the beautiful wooden interior but struggled with a dull gray light that made it look more like a cave than a cozy retreat. After some clever editing (think color correction and exposure adjustments), those warm wooden tones popped, inviting potential guests to snuggle up by the fireplace instead of questioning how many bats lived overhead.
Another standout example involves “City Escape,” an apartment boasting stunning skyline views. The original shot had lovely scenery but was overexposed, leading to features fading into bright white blobs. By adjusting brightness and contrast while adding a touch of sharpening on key details like pillows and decor items, this image went from wishy-washy to welcoming! Suddenly, viewers could envision their morning coffee ritual as they watched the sunrise over town—or maybe just imagined catching some Instagram likes from their followers.
By analyzing these transformations, we can identify what worked particularly well in each case study. Both hosts took full advantage of color correction to enhance natural hues without losing authenticity—no one wants colors so vibrant they look like something out of a cartoon! Additionally, strategic use of softening techniques turned stiff spaces into airy retreats that any traveler would want to book immediately.
So what are our key takeaways? First off, always consider your lighting situations when taking those initial shots—natural light is your best ally! Secondly, don’t shy away from experimenting with editing tools; even small tweaks can yield stunning results. Finally, remember: less is often more! Subtle enhancements will maintain your property’s unique charm while making it stand out like that special hot sauce everyone keeps trying to replicate at home (seriously though… who doesn’t want guests talking about their stay long after check-out?). Now let’s take what we’ve learned here and start sprinkling some digital magic on your own Airbnb photos!
Wrap It Up: Your Airbnb Photo Magic Awaits!
And there you have it, folks—your ultimate guide to leveling up those tired Airbnb photos!
From mastering color correction to fine-tuning those brightness and contrast levels, you’re now armed with the secrets that will make your listing pop like a freshly opened bottle of bubbly.
Remember, while filters can be fabulous, there’s nothing quite like embracing authentic aesthetics; after all, nobody wants to look at an Airbnb photo that’s been edited more than a Hollywood blockbuster.
So go ahead and experiment with these techniques! Get creative with your airbnb photoshoot and turn all your vacation rentals into jaw-dropping showcases before potential guests even think about scrolling past.
High-quality images aren’t just a nice touch—they’re practically a glowing neon sign shouting “Book me!”
Remember, investing in professional quality imagery is not just good for business; it can leave both you and your guests feeling fabulous! Now get out there and edit like the photography pro you are destined to be!


